Below is the link to the PDF of my project documentation for the 2nd Assignment:
*COPY AND PASTE LINK
http://www.mediafire.com/?tcvlxutudst
Alternate link:
http://www.sendspace.com/file/jfjknv
Final Artefact Submitted on Disc (avi file)
Link: http://www.youtube.com/watch?v=W9_viX0Uy-k
Bibliography:
http://libbraille.org/translator.php?src=seagull&table=standard
http://www.openfootage.net
http://www.archive.org/ Footage courtesy of Ivan Bridgewater
http://soundsnap.com/
http://librivox.org/ - Poem Read by Alan Davis Drake (Poem - "My soul is Awakened by Anne Bronte")
http://commons.wikimedia.org/wiki/Image:CELLO_ENCORES_JOHN_MICHEL-Jason_Marsh_Starfire.ogg
Thursday, 29 May 2008
Wednesday, 2 April 2008
Etude Four (4) - Final Piece
Above is the original clip I extracted from the film untouched including the original titles. Below is the edited version I created. At the end of this etude I feel like I have accomplished what I had set out to do but I wished I allowed myself more time to experiment more with 3D Typographical animation and create a longer title sequence to include more credits from the film. In terms of the other films I felt I made the best decision to select this one as I believe I had a better idea of how I could emulate the them and tone of the film. I'm hoping an audience to this piece will invest more interest into the film due to its revised presentation as I had initially intended as well as keep the fans of the original interested or better still cause them to re-invested their interest for the film.
Etude Four (4) - Process
Ultimately I had decided to focus on a single film and its quality in the title sequence after analysing the selected films. With "Black Samurai" the title sequence still holds up well and therefore any improvement by me may feel as if it wasn't as necessary as I thought it would've been. With the film "Return of the Kung Fu Dragon" the picture and sound quality available wasn't ideal and I wanted to stay away from the pure martial arts film such as this due to my research and general use of the genre in modern media. I considered using "Death Rides A Horse" carefully after downloading a higher resolution of the film but the film "Return of the Street Fighter" intrigued me more due to its tone and premise. Therefore I obtained a higher resolution set of files of the film from Archive.org.

Initially I began making rough notes (above image) whilst watching the film as to where the original titles were and how effective they were in the film. I then began making a few rough sketches and went straight into editing and extracting the scenes I would alter. The scene I selected was chosen due to the introduction style of the main character and its build up and it also wasn't the location for the original titles which appears later in the film.

With a rough idea of how I wanted the titles to appear I focused on creating a title sequence that would be short and more an example of how it would look if I spent a lot more time in including and elaborate sequence to include more credits other than the main characters. I then began immediately thinking of the visual style I wanted for the titles as well as animation and then began downloading fonts courtesy of Openfontlibrary.org, which has many open license and creative commons licensed fonts available for downloaded. With this installed I then went into 3D Studio Max and began creating the main titles (image above) . As this film was the last in a trilogy I took into consideration how the titles could help reinforce that which I achieved by making a conscious decision to only have the main part of the film's title in 3D i.e. "Street Fighter" and add the other the other text within After Effects.


After modelling and animating the main visual elements within 3D Max I exported the frames as a PNGs to maintain the alpha/transparency so that I could composite them within After Effects. Once in After Effects I began editing the film clip I extracted to obtain the audio from the start of and then cut that sequence out so that it began where I wanted. I then rendered out a clip and the last frame of the clip to create the start of the title sequence.

Within Photoshop I took the rendered frame and edited it so that it isolated Sonny Chiba's character (main character) and preserved its transparency by saving it as a PNG file so that I could composite additional visual elements as I had intended within After Effects.


Font reference:
Open Font Library [online] - Available at: http://openfontlibrary.org [cited 1st April 2008]

Initially I began making rough notes (above image) whilst watching the film as to where the original titles were and how effective they were in the film. I then began making a few rough sketches and went straight into editing and extracting the scenes I would alter. The scene I selected was chosen due to the introduction style of the main character and its build up and it also wasn't the location for the original titles which appears later in the film.

With a rough idea of how I wanted the titles to appear I focused on creating a title sequence that would be short and more an example of how it would look if I spent a lot more time in including and elaborate sequence to include more credits other than the main characters. I then began immediately thinking of the visual style I wanted for the titles as well as animation and then began downloading fonts courtesy of Openfontlibrary.org, which has many open license and creative commons licensed fonts available for downloaded. With this installed I then went into 3D Studio Max and began creating the main titles (image above) . As this film was the last in a trilogy I took into consideration how the titles could help reinforce that which I achieved by making a conscious decision to only have the main part of the film's title in 3D i.e. "Street Fighter" and add the other the other text within After Effects.


After modelling and animating the main visual elements within 3D Max I exported the frames as a PNGs to maintain the alpha/transparency so that I could composite them within After Effects. Once in After Effects I began editing the film clip I extracted to obtain the audio from the start of and then cut that sequence out so that it began where I wanted. I then rendered out a clip and the last frame of the clip to create the start of the title sequence.

Within Photoshop I took the rendered frame and edited it so that it isolated Sonny Chiba's character (main character) and preserved its transparency by saving it as a PNG file so that I could composite additional visual elements as I had intended within After Effects.


Within After Effects I imported the edited frame, cut the clip into the footage and imported the 3D titles created in Max. I then began experimenting with visual effects to achieve the right tone for the titles and working with the rendered frame I began compositing elements and text for the sequence.

With this complete I began re-editing the clips so that the original following scene continued after the title sequence.


With this complete I began re-editing the clips so that the original following scene continued after the title sequence.

Font reference:
Open Font Library [online] - Available at: http://openfontlibrary.org [cited 1st April 2008]
Thursday, 27 March 2008
Etude Four (4) - Concept
The general concept for this etude is straightforward and caused to me to immediately create comparisons in the modern media. This led to easily uncovered research as old media revival is not new but mainly in terms of promotional material has this been commonly seen. For example the promo for the Big Boss film (promo) utilised masking techniques to composite 2D & 3D graphical elements into the scenes with Bruce Lee from the film.
Video available from: http://youtube.com/watch?v=EFH35qNf_Hw [cited 26th March 2008]
I have compiled a list of films I liked the look of from a brief overview using Publicdomainmotionpictures.com and Archive.org as resources and references. In essence I intend to create a type of promotional montage of re-edited title sequences for the films but in a way so that the re-edited sequences will be perceived as the actual title sequences for the films rather than just promotional pieces. I made a conscious choice to utilise public domain movies in a celebratory manner for artistic and creative freedom rather than select an old film I knew of and liked but was under copyright.
My main intention is to create several re-edit titles with a maximum of 3, however if time doesn't permit this then I will simply focus on a single film. For effect I may be selecting scenes from later into the actual film that seem to reflect the films title and theme well and it will be in that sense where it can be perceived as promotional but I will be creating it and using the original credits to produce the title sequence as accurately to the films theme and tone as I can. An additional purpose for creating these titles is to show the audience that old films (especially those now in the public domain) are still worth watching and re-create interest in them for the audience and other artists alike. I will also edit the title sequences to continue with an additional following scene segment to maintain the film's theme before the next.
The compiled film list includes:
Black Samurai (1977)
Available from: http://www.archive.org/details/Black_Samurai [online] [cited 25th March 2008]
Return of the Kung Fu Dragon (1976)
Available from: http://www.archive.org/details/Return_of_the_Kung_Fu_Dragon [online] [cited 25th March 2008]
Death Rides a Horse (1967)
Available from: http://www.archive.org/details/Death_Rides_A_Horse_pan_and_scan [online] [cited 25th March 2008]
Return of the Street Fighter (Satsujin ken 2) (1967) / IMDB - (1974)
Available from: http://www.archive.org/details/ReturnofTheStreetFighter [online] [cited 25th March 2008]
References available at:
http://www.publicdomainmotionpictures.com/
http://www.archive.org/
Essentially the final pieces will also be a demonstration in Motion Graphics animation and I will decide during the creative process how contemporary I want the animation style to be as I have also chosen films where I feel it could benefit from a title sequence makeover. Exceptions may include Black Samurai which already has a good title sequence but I feel as if could improve upon it for effect.
Examples of old production logos are seen below:
Video available from: http://youtube.com/watch?v=Fr8TYxd9qbU [cited 26th March 2008]
One of the main factors I had considered carefully that this video helps to highlight was the use of the original soundtracks from the films for use in the title sequence. A good example of consideration or an homage to classic films is seen in the title sequence for the film "Kiss Kiss Bang Bang" (2005)
Video available from: http://youtube.com/watch?v=_bpP9sI72bM&feature=related [cited 26th March 2008]
Other films such as Superman Returns (2006) had their title sequences faithfully recreated to match that of the previous films. Therefore creatively I will consider how effective the style and methods I use will be to match the film and in essence the sense of context and the era in which it was made e.g. the animation style, colours and clarity (distorted lens, dirt, dust and scratches).
Additional film references:
IMDB Available at: http:www.imdb.com/ [cited 26th March 2008]
Tuesday, 25 March 2008
Etude Four (4) - Introduction
Etude Title:
Still got it!
In this final etude I feel obligated to continue on the area I was previously focusing on, which was old films within the public domain. For this etude I intend to create a sort series of revamping exercises that is more practical than my more experimental etude before. My aim is to use several select movies that are in the public domain and re-edit the title sequence for each film using 3D and 2D motion graphics whilst still maintaining the general theme. The final product will be a montage of short extracts of each film with re-edited title sequences.
Saturday, 22 March 2008
Etude Three (3) - Final Process and Evaluation
In a compromise I decided to further edit the footage and tracking data I already had in After Effects and instead I may re-explore the area in the final etude. Below is my final submission for this piece. I used After Effects to add noise, grain and lens blur as well as other effects to help integrate the models into the scene which I believe I achieved quite well. However the jittery tracked movement greatly removes the objects from the scene and I believe that more considerate tracking and format conversions would improve the quality of the object placement and thus the overall piece. I believe the etude was successful in creating a surreal and original piece as intended but it was done as effectively as I wanted. In addition I feel as if a viewer would observe this piece for its potential as I have. In terms of the next etude my initial intentions are to explore this area of creativity and visual effects even further.
Friday, 21 March 2008
Etude Three (3) - Evaluated Process
I felt as though I could end the etude as it was as an attempt to create piece the I had initially conceptualised but as I began to look through footage and films I began to filter my search to preference. I found that many martial arts films are in the public domain however I am aware that remixing of old martial arts media isn't particularly new, for example the music producer/artist "RZA" is well known for being a martial arts fan and has remixed the audio from many martial arts films and the film "Kung Pow: Enter the fist" is a comedic parody of old film and utilises compositing, character replacement and careful editing. In addition the music video for the group "The Chemical Brothers" contained a number of edited shots using facial editing/cg replacement on actors faces to have them lip sync with the song "Get Yourself High" (below).
Therefore creatively I am considering whether or not I should use martial arts films. This decision depends on the film I find and what I believe I could add to the footage. If this seems unachievable within the time constraints i.e. proves too time consuming then I will do what I had previously stated in the last entry.
Chemical Brothers - "Get Yourself High" Directed by Joseph Kahn Music Video Available at:
http://www.youtube.com/watch?v=lqBjSbc77Qo&eurl
or
http://www.boardsmag.com/screeningroom/musicvideos/897/#
[accessed 21st March 2008]
Thursday, 20 March 2008
Etude Three (3) - Initial Process
After downloading several films and pieces of footage from Archive.org I decided to select the short documentary type film called "Angry Boy", which is a two part short drama piece that explores child psychology and focuses around a young boy. I narrowed down my shot selection to the beginning of a short pan to the right which I thought would be ideal for camera tracking as it has a small space centre screen where I could initially just test whether the footage was good enough to track well and incorporate 3D objects.

Above image available from: (http://www.archive.org/movies/thumbnails.php?identifier=AngryBoy1950)

Above image available from: (http://www.archive.org/movies/thumbnails.php?identifier=AngryBoy1950)
With the scene isolated I then began to convert the frames of the scene into Targa files (.tga) in Adobe Premiere, which is the only format that the camera tracking software Voodoo reads files on Windows. Initially I had to convert the video to a WMV and then render off into Targa files due to errors in the import process to Premiere, which may have affected quality and was one of my main concerns especially when considering the age and initial quality of the footage which wasn't ideal. I then imported the files into Voodoo which read each frame and set tracking points that would be used in 3DS Max to help add geometry to the scene.

As I had initially feared the footage was too jittery to accurately calculate and track therefore the added 3D objects slide around inaccurately. Although the pan of the camera is accurate enough there is too much noticeable noise in the cameras movement when it was tracked and therefore the objects aren't seamlessly integrated into the scene in terms of placement.
I later attempted to use After Effects stabilize feature to help reduce this movement but it wasn't enough to help. Therefore instead of continually altering already low resolution footage I decided to look for better footage.
If I am unable to locate adequate footage I will either film an area for tracking and simply demonstrate 3D compositing with an accurate track or use higher resolution stock footage to track and add objects to or edit.
Voodoo Software downloaded from: (http://www.digilab.uni-hannover.de/download.html)
Additional references:
http://www.digilab.uni-hannover.de/docs/manual.html
http://www.max-animation.com/voodoo_camera_tracker.htm
http://www.computerarts.co.uk/tutorials/3d__and__animation/the_rules_of_camera_tracking
Dobbert, T., 2005. The rules of camera tracking. [Ebook]. 3D World.
(available at: http://www.computerarts.co.uk/tutorials/3d__and__animation/the_rules_of_camera_tracking)

Above shows Voodoo tracking the points on the footage with the green markers being placed in areas that will be tracked and preserved for exporting to another package. The information/status window did report I higher number of errors and failed capture points.
I then exported the data into a 3DS Max Script to later import into 3DS Max. Below shows the scene I set up in 3D Max after running the exported voodoo script which created a camera and tracking points in Max. Then using the created voodoo camera I set up two teapot models, lights and a plane with a matte/shadow map applied to it to capture their shadows and match the lighting to the footage. I also added the original scene's footage to the background of the Camera's viewport so that I had a reference when creating the scene in Max.

I then exported the data into a 3DS Max Script to later import into 3DS Max. Below shows the scene I set up in 3D Max after running the exported voodoo script which created a camera and tracking points in Max. Then using the created voodoo camera I set up two teapot models, lights and a plane with a matte/shadow map applied to it to capture their shadows and match the lighting to the footage. I also added the original scene's footage to the background of the Camera's viewport so that I had a reference when creating the scene in Max.

Below shows an example of the test after I combined the separately rendered layers in After Effects.
As I had initially feared the footage was too jittery to accurately calculate and track therefore the added 3D objects slide around inaccurately. Although the pan of the camera is accurate enough there is too much noticeable noise in the cameras movement when it was tracked and therefore the objects aren't seamlessly integrated into the scene in terms of placement.
I later attempted to use After Effects stabilize feature to help reduce this movement but it wasn't enough to help. Therefore instead of continually altering already low resolution footage I decided to look for better footage.
If I am unable to locate adequate footage I will either film an area for tracking and simply demonstrate 3D compositing with an accurate track or use higher resolution stock footage to track and add objects to or edit.
Voodoo Software downloaded from: (http://www.digilab.uni-hannover.de/download.html)
Additional references:
http://www.digilab.uni-hannover.de/docs/manual.html
http://www.max-animation.com/voodoo_camera_tracker.htm
http://www.computerarts.co.uk/tutorials/3d__and__animation/the_rules_of_camera_tracking
Dobbert, T., 2005. The rules of camera tracking. [Ebook]. 3D World.
(available at: http://www.computerarts.co.uk/tutorials/3d__and__animation/the_rules_of_camera_tracking)
[accessed 20th March 2008]
Etude Three (3) - Concept
In terms of resources I am already aware of many that I can obtain old footage from. The primary source is the extensive www.archive.org which has many members and organisations affiliated with it who upload media to their severs under specific licenses. The Creative Commons Organisation is one of the key groups to aid in the freedom of reusable media as their now global self licensing system has allowed media artists to search and use various media past and present legally depending on the type of license as well as license their own work. It has also allowed other organisations to help clarify which licenses are applicable to old films and footage. The main license I am looking to filter my search via is the public domain license which films will generally fall under after a number of years and if their copyright license is not renewed. For example the "Bruce Lee: the lost interview" is a piece of footage that was lost and then found again in 1994 and aired in a Bruce Lee TV special due to the fact that since prior to 1989 its copyright license was not renewed and therefore fell into the public domain and is available for download and editing.

Above Image (available at: http://www.archive.org/movies/thumbnails.php?identifier=BruceLeeTheLostInterview)
[accessed 20th March 2008]

Above Image (available at: http://www.archive.org/movies/thumbnails.php?identifier=BruceLeeTheLostInterview)
[accessed 20th March 2008]
At this stage I am analysing several pieces of footage and films to edit effectively. Possible issues I am already aware of include image quality and how that will effect tracking data and points in an image. Image quality is also a major factor and distortion, noise, grain, dust and scratches on the film will have to be either replicated on the added CGI elements or disregarded as piece to select and edit. Thus far I have not been strict on filtering my selection of footage as I am unsure as to how well the tracking process will go. Believability will be affected by these factors yet this will also be hindered depending on the type of effect I decide to apply. In addition when analysing the footage my intentions are to enhance the footage or viewing experience for the audience, which may simply be through subtle satire added via CG elements.
Film references:
http://www.archive.org
http://imovies.blogspot.com/
http://www.desertislandfilms.com/MarArtsPD.html
http://www.publicdomainmotionpictures.com
http://creativecommons.org/
[accessed 20th March 2008]
Film references:
http://www.archive.org
http://imovies.blogspot.com/
http://www.desertislandfilms.com/MarArtsPD.html
http://www.publicdomainmotionpictures.com
http://creativecommons.org/
[accessed 20th March 2008]
Tuesday, 18 March 2008
Etude Three (3) - Introduction
Etude Title:
Ye Olde CGI
In this etude I intend to explore the field of compositing and CG in film. Compositing is a discipline that is now common place in feature films and TV whether it is obvious (large robot destroying a city) or subtle and seamless enough for it even to be disregarded as CGI (replacing a pen with a 3D pencil). A main alteration in modern cinema is due to technological advancement and thus the capabilities a film maker has is now infinite. In the past film makers were obviously unable to create such jaw dropping effects as they do today. This leads to the concept of my module of what would old films and TV programmes look like with CGI applied to them. The Director Steven Spielberg applied this notion with his film "E.T. - the extra terrestrial"(1982) in its remake (2002), which incorporated a 3D ET in many scenes which he had initially desired. However for my etude I intend to take footage from an even earlier period and apply additional effects to them as seamlessly as I can by either adding 3d objects or editing the footage to create sense of 3D depth. This will essentially alter the scene/film I select and create an interesting and original concept with the end product being a surreal combination of old film and CGI. This will involve some camera tracking and as I have yet to properly learn this skill it will also be an exercise in compositing techniques.
To achieve this I will most likely be using 3DS Max, After Effects and the free tracking software Voodoo.
ET reference cited: (available at: http://www.channel4.com/film/reviews/film.jsp?id=103012)
[accessed 18th March 2008]
Saturday, 15 March 2008
Etude Two (2) - Technical Process Part 2


Above images show a render using the checker map with a Skylight and Light Tracer render within Max and a specular map I later created below that. The skylight render was an improved result over the Ambient Occlusion render in my opinion. However the specular map didn't create the desired effect when applied and rendered and the glossiness on the lips wasn't as defined which meant I would either have to seperate the lips from the rest of the UV map or find a way to seperate their properties in the material editor as when rendered the face was quite shiny and the lips did not have the desired level of specular detail that I wanted.


The above image is a result of the edited texture with a customised specular map which was achieve by using a multilayer shader in the material editor and applying two seperate specular maps into different channels. A metal like shader was applied to the lips and a seperate one for the rest of the face and eyebrows. However with the skylight render the material appeared lighter than normal with the highlight line on the lip also appearing more contrasted against the skin than I anticipated and therefore required editing. Fortunately Max monitors the updating of the texture's image file, which made editing easier, therefore I made many edits to the texture file to try and get the texture to the desired skin tone. (below)


My main concern at this point was to highlight the model's features and attempt to match the original concept as well as enhance it. I then decided to sample colours from the original concept and edit them to delicately enhance the features of the model and accentuate areas such as the cheeks and eye area.


In addition I used the texture image below to help break up/randomise the texture's surface.
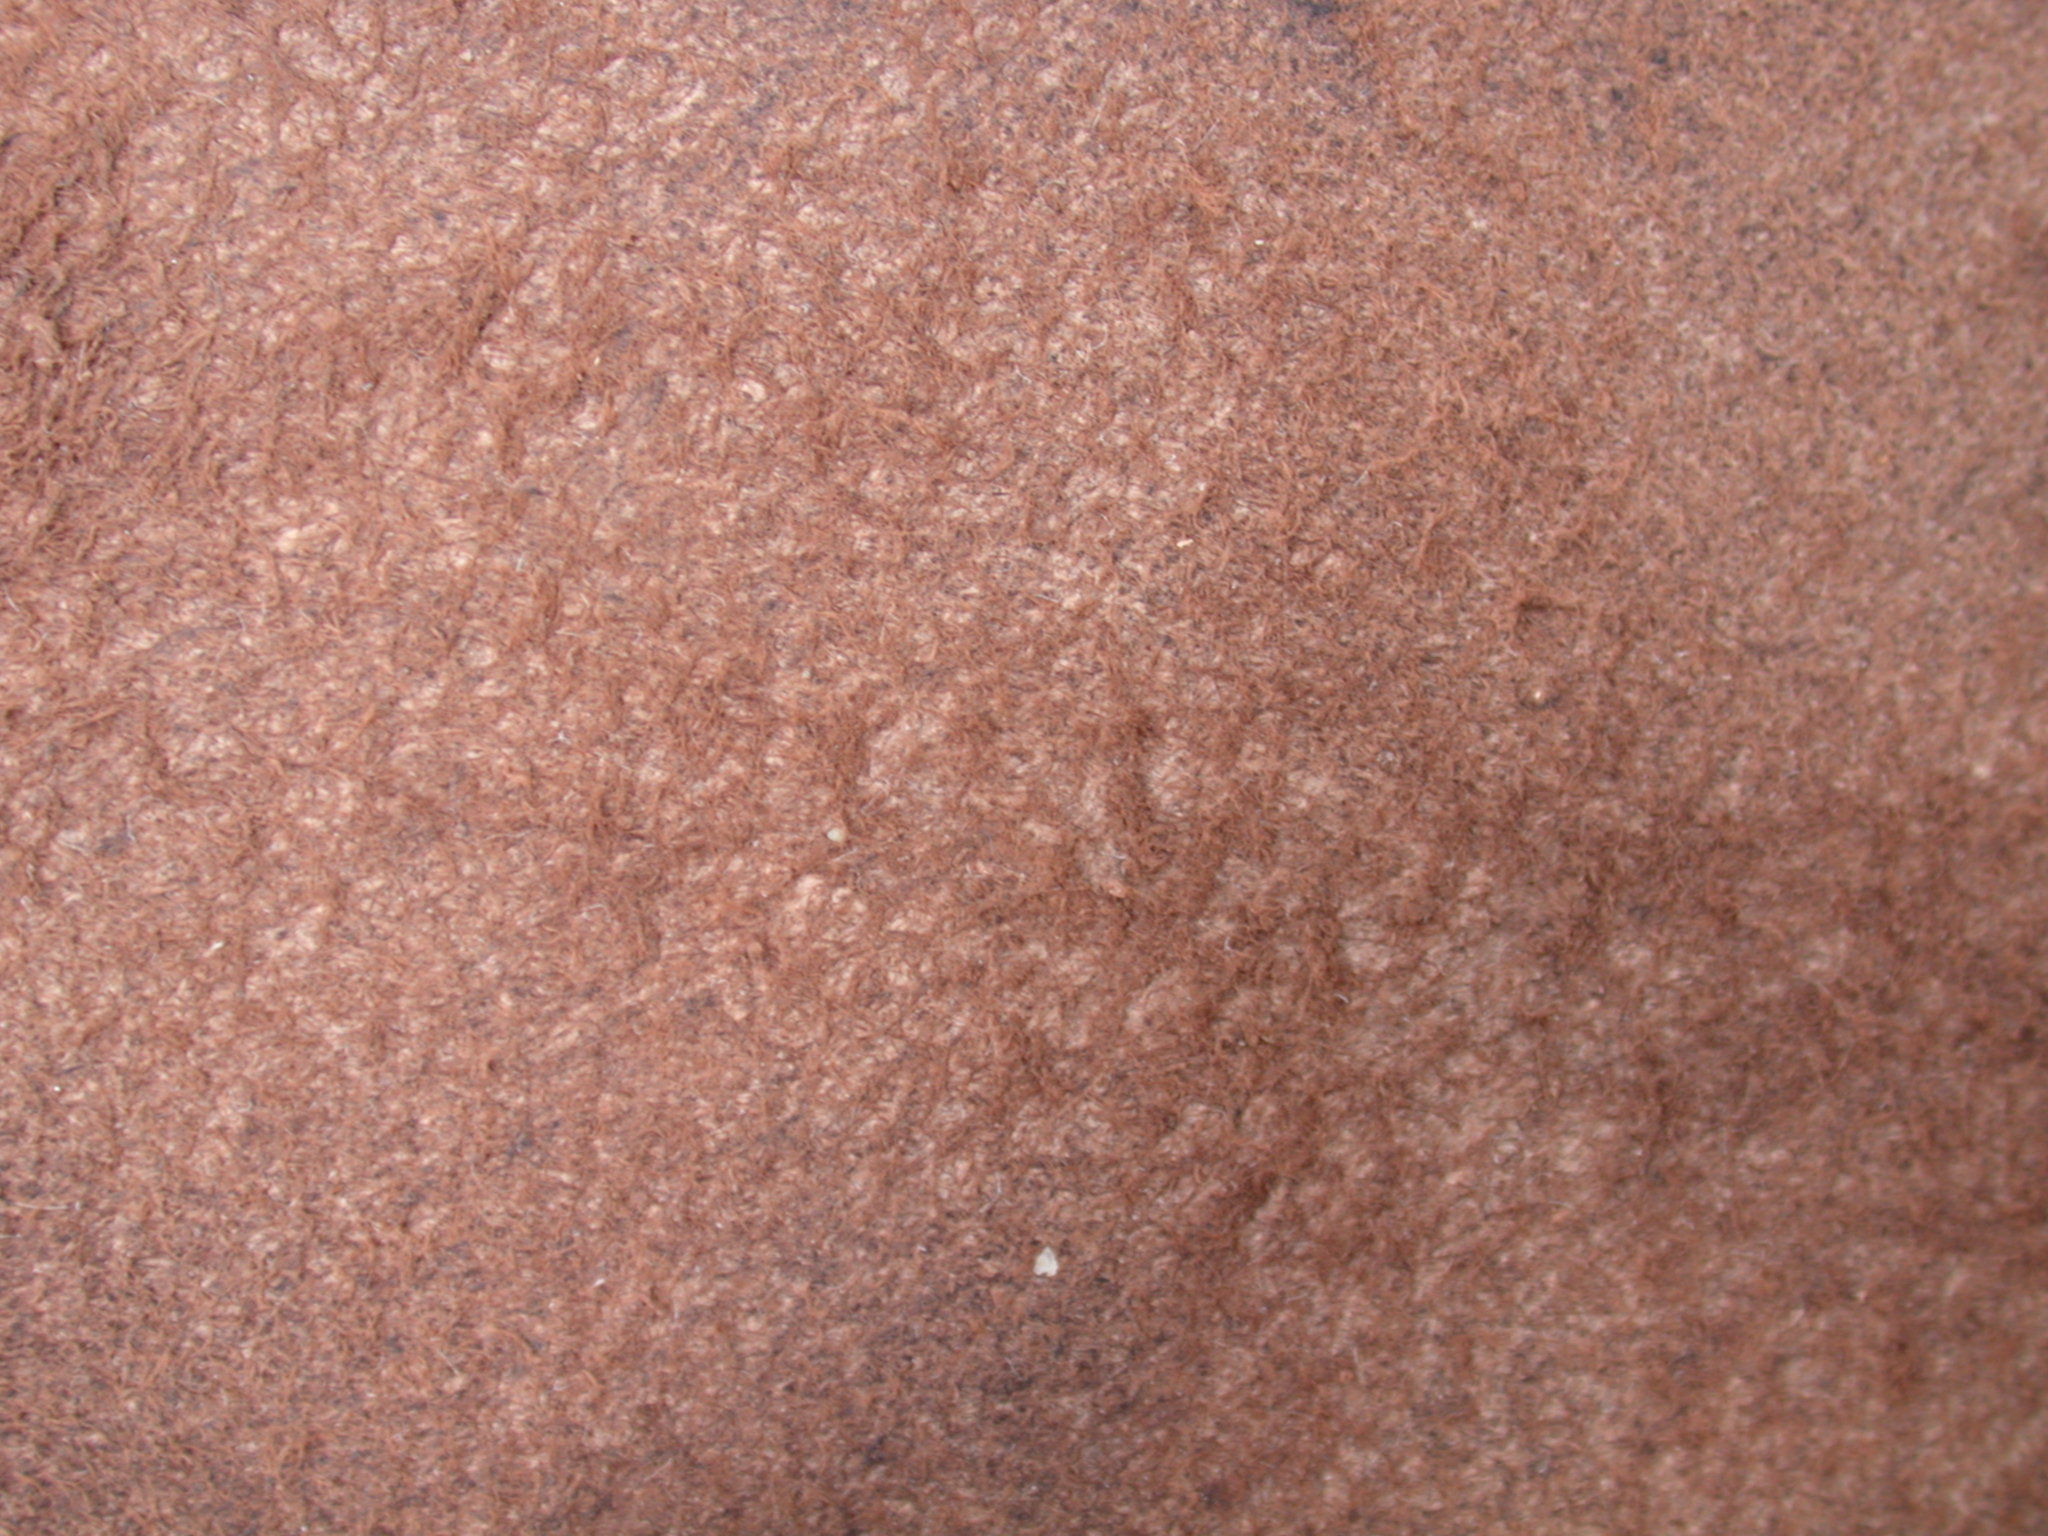
Above image available at: http://imageafter.com/image.php?image=b6leather_skin006.jpg
[cited: 14th March2008]
Below is the final map used with unwrapped UV on top of it.

Evaluation
I am relatively pleased with the final result and I am glad that I am now educated in how to use different elements to create a texture as well as how to light it to get the desired result. For later study I would like to experiment more with three point lighting to further improve my renders of the final piece. This may be an area for another study but I am satisfied with the result and the use of combined elements and references to help achieve this. I believe that the study was a success as I feel that the final piece is close to the original concept and that the process demonstrates a number of combined disciplines in several formats to achieve a final 3D product hence being a hybrid of creative practice.
Additional Technical References:
http://poopinmymouth.com/tutorial/normal_workflow.htm
Demers, O. 2001, "Digital Texturing and Painting" 2nd ed. New Riders Press
http://www.game-artist.net/forums/vbarticles.php?do=article&articleid=37
http://reality.artificialstudios.com/twiki/bin/view/Main/StaticShadowMapping
[accessed: 12th March 2008]
Friday, 14 March 2008
Etude Two (2) - Technical Process Part 1
To create the map I am required to make my model ready for mapping by essentially converting it into a 2D format for customising. To achieve this I utilised the UV unwrap modifier in 3DS Max which allows me to unwrap the head model into segments for exporting. This process involved flattening out the unwrapped 3d mesh so that all the polygons were clearly laid out for editing.

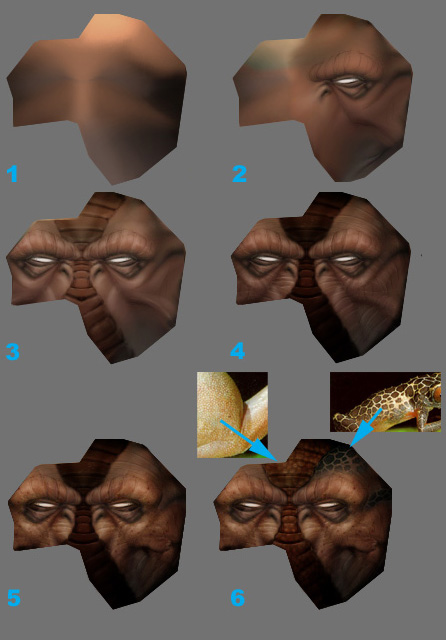
The above image shows the 3d model with a checker material map applied to it that will help establish areas of distortion to rectify. In addition at this stage I must establish areas where the mesh model will be split i.e. seams.

Above image shows the model's mesh unwrapped and spread out in the UV editor. It's within the editor that I flattened or "relaxed"areas of the mesh to help prevent overlapping polygons exposing all of them so they are visible for painting over. Such areas include the eyes, lips and nose but I needed to keep the "relaxing" of polygons to a minimum as it would apparently cause material stretching.

The image above shows a exported render of the unwrapped UV I completed. For the process I utilised the plug-in Textporter from Maxplugins.de. This plug-in helped me to export the UV map as a black and white image so that I could use the alpha properties to help create a texture map beneath the wireframe. The above image is a rough normal map render created using the plug-in and although relatively useless the normal map render will help to establish the form of the model and thus help me to establish the form of the model in its 2D format.
Textporter available at: www.maxplugins.de/

For this process I used multiple references which were relatively vague or assumed the user had the ability to unwrap the model and were mostly work flow tutorials. Therefore I had to guess and experiment quite a bit for the desired effect. The above image is a test texture I made to establish how accurate the texture I made is when applied to the model.


Above image was used to help break up the texture created,
available at:
The above image is an example of the initial texture I created with some integrated texture details e.g. freckles. Photography played a key role in my image referencing with the lips and cheek area receiving the most attention. The image below is an example of the photos analysed for reference and would serve future reference for the model's specular level details i.e. light properties.


The above image shows the 3d model with a checker material map applied to it that will help establish areas of distortion to rectify. In addition at this stage I must establish areas where the mesh model will be split i.e. seams.

Above image shows the model's mesh unwrapped and spread out in the UV editor. It's within the editor that I flattened or "relaxed"areas of the mesh to help prevent overlapping polygons exposing all of them so they are visible for painting over. Such areas include the eyes, lips and nose but I needed to keep the "relaxing" of polygons to a minimum as it would apparently cause material stretching.

Textporter available at: www.maxplugins.de/

For this process I used multiple references which were relatively vague or assumed the user had the ability to unwrap the model and were mostly work flow tutorials. Therefore I had to guess and experiment quite a bit for the desired effect. The above image is a test texture I made to establish how accurate the texture I made is when applied to the model.

Above image shows the previous texture applied to the model. At this point I proceeded in creating a texture in Photoshop using multiple references including my own skin. I didn't wish to create a texture that was too complex and over textured but I did wish to include subtle details that will enhance the appearance of the model. Therefore I included freckles and other subtle textures that helped to break up the materials colour.


Above image available from: http://web.cornell.edu/studentblogs/jenna/wp-content/uploads/2007/02/freckles.jpg
[cited: 12th March 2008]
[cited: 12th March 2008]
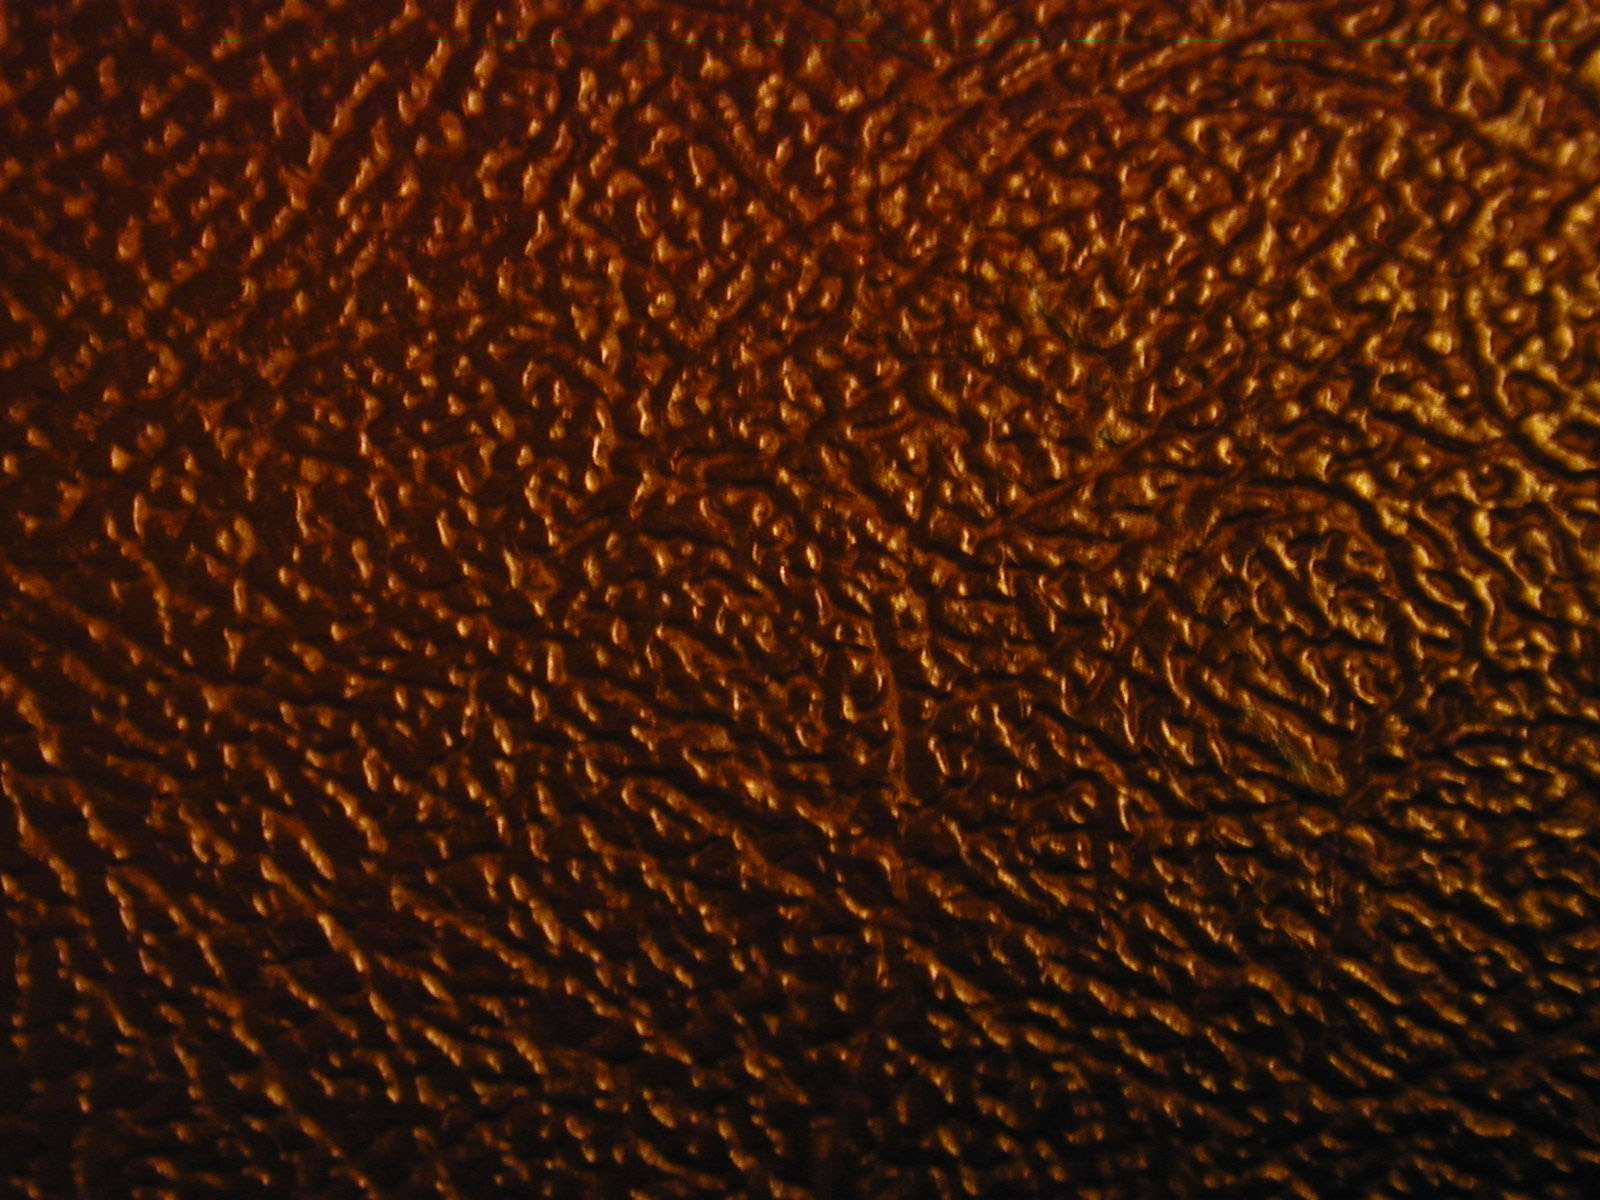
Above image was used to help break up the texture created,
available at:
http://www.imageafter.com/dbase/textures/leather_skin/b1leather001.jpg
[cited: 12th March 2008]

[cited: 12th March 2008]

The above image is an example of the initial texture I created with some integrated texture details e.g. freckles. Photography played a key role in my image referencing with the lips and cheek area receiving the most attention. The image below is an example of the photos analysed for reference and would serve future reference for the model's specular level details i.e. light properties.

Above image available at: http://tn3-2.deviantart.com/fs9/300W/i/2006/056/2/6/lips_by_XtenajX.jpg
[cited: 12th March 2008]
[cited: 12th March 2008]
Sunday, 9 March 2008
Etude Two (2) - Analysis and Developing Elements
Real world references are a major influence in the texturing process and although it may be presented in a 2D format i.e. images, it is essentially analysed for 3D purposes which is why lighting awareness and techniques are incorporated into the process. By extracting elements from the real world artists are able to synthesise convincing media for use in their artwork. This is a key skill which in itself is a hybrid of multiple forms i.e. the analysis of the properties of textures and surfaces and the manner in which it reacts to light. This itself is a skill that requires analysis in the 3D sense much like a sculptor. Therefore these are factors to consider when creating my materials.
Below is an example of a work flow in creating a texture for a 3D model. Skin textures are taken from wildlife photographs to help add detail to the model's texture and is essentially a hybrid of a custom palette and real world elements to be applied onto a 3D model.

Above Image available at: http://www.bobotheseal.com/Skinning_mini-tutorial_01.htm [accessed 9th March 2008]
Material 'shaders' are a key element in most 3D programs and generally dictate the lighting and rendering properties of a texture and deserves careful attention. For my face texture I need to customise or acquire a good skin shader that will carry realistic properties of skin this will be aided by multiple maps assigned for different properties e.g. specular and bump levels. Ben Cloward is an example of an artist that has aided in this customisation process as he has designed and created a small set of shaders for use within 3DS Max for such key texture surfaces as skin that I may consider using to enhance the texture I will create.
References:
Available at:
http://www.bencloward.com/shaders_skin.shtml
http://www.autodesk.co.uk/adsk/servlet/index?siteID=452932&id=9898976
[accessed: 9th March 2008]
Key Points
As my character model is of a young girl there are certain artistic factors to consider when creating the texture.In addition as she is young the signs of age would be less apparent or just absent i.e. wrinkles and skin discolouring. Therefore the texturing process will be focused on accentuating the facial features to enhance a youthful look (much like make up). Also my original concept is intended to be generally cartoon like but with some real world references so I will be using a slightly off palette selection of colours instead of a more realistic skin palette.
Below is an example of a work flow in creating a texture for a 3D model. Skin textures are taken from wildlife photographs to help add detail to the model's texture and is essentially a hybrid of a custom palette and real world elements to be applied onto a 3D model.
Above Image available at: http://www.bobotheseal.com/Skinning_mini-tutorial_01.htm [accessed 9th March 2008]
Material 'shaders' are a key element in most 3D programs and generally dictate the lighting and rendering properties of a texture and deserves careful attention. For my face texture I need to customise or acquire a good skin shader that will carry realistic properties of skin this will be aided by multiple maps assigned for different properties e.g. specular and bump levels. Ben Cloward is an example of an artist that has aided in this customisation process as he has designed and created a small set of shaders for use within 3DS Max for such key texture surfaces as skin that I may consider using to enhance the texture I will create.
References:
Available at:
http://www.bencloward.com/shaders_skin.shtml
http://www.autodesk.co.uk/adsk/servlet/index?siteID=452932&id=9898976
[accessed: 9th March 2008]
Key Points
As my character model is of a young girl there are certain artistic factors to consider when creating the texture.In addition as she is young the signs of age would be less apparent or just absent i.e. wrinkles and skin discolouring. Therefore the texturing process will be focused on accentuating the facial features to enhance a youthful look (much like make up). Also my original concept is intended to be generally cartoon like but with some real world references so I will be using a slightly off palette selection of colours instead of a more realistic skin palette.
Wednesday, 5 March 2008
Etude Two (2) - The Concept
In this etude I will be practising texturing techniques on the head model created in the 1st etude as well as simple geometric shapes that will be slightly edited e.g. eyeballs, small metal objects, tables etc.

Techniques I'm aware of include normal and displacement mapping as well as other software that aids in creating more detailed surfaces on models such as Z brush or Mudbox. However I will utilise custom mapping purely within 3DS Max and Photoshop to create the desired effect with focus on visually enhancing the head model and eyes.
Below is an example of an unwrapped model that has been textured in several formats to enhance details once reapplied.

Above image - Available at:http://www.cgarena.com/freestuff/tutorials/zbrush/wolverine/image037.jpg
A key element of texturing is to recreate real world elements in 3D or enhance the realism of a 3D piece. This essential technique in 3D art is fundamentally a hybrid of design elements, for example the taking of photographs of a wall and applying it to a 3d model of a wall which can be further enhanced in its realism with correct lighting and additional texture enhancements e.g. displacement and bump maps.
In 3DS Max there is also a plugin available called Deep UV which is supposed to aid in the texturing process, therefore I may explore the use of this in my texturing process.
Technique Evaluation
Although techniques such as Normal mapping are very important in modelling its key area is gaming and the simulating of a high res model on a low polygon model, which is achieved through careful material map editing that will be used to manipulate the manner in which light reacts to the models surface. A good technique but ultimately not required for my piece as I aiming to create a simple 3D character model that is close to the original concept in 3D and doesn't require too much intricate details which normal mapping could provide. Displacement mapping may be more of use which is essentially the same as normal mapping but serves the purpose of creating greater detail on an already detailed model i.e. similar to a bump map which creates the illusion of depth e.g. spots and lumps.
References:
Ahern, L., 2006. "3D Game Textures: Create Professional Game Art Using Photoshop". Focal Press Publishing
http://www.mudbox3d.com [accessed 4 March 2008]
http://www.pixologic.com/ [accessed 4 March 2008]

Techniques I'm aware of include normal and displacement mapping as well as other software that aids in creating more detailed surfaces on models such as Z brush or Mudbox. However I will utilise custom mapping purely within 3DS Max and Photoshop to create the desired effect with focus on visually enhancing the head model and eyes.
Below is an example of an unwrapped model that has been textured in several formats to enhance details once reapplied.

Above image - Available at:http://www.cgarena.com/freestuff/tutorials/zbrush/wolverine/image037.jpg
[accessed 4 March 2008]
A key element of texturing is to recreate real world elements in 3D or enhance the realism of a 3D piece. This essential technique in 3D art is fundamentally a hybrid of design elements, for example the taking of photographs of a wall and applying it to a 3d model of a wall which can be further enhanced in its realism with correct lighting and additional texture enhancements e.g. displacement and bump maps.
In 3DS Max there is also a plugin available called Deep UV which is supposed to aid in the texturing process, therefore I may explore the use of this in my texturing process.
Technique Evaluation
Although techniques such as Normal mapping are very important in modelling its key area is gaming and the simulating of a high res model on a low polygon model, which is achieved through careful material map editing that will be used to manipulate the manner in which light reacts to the models surface. A good technique but ultimately not required for my piece as I aiming to create a simple 3D character model that is close to the original concept in 3D and doesn't require too much intricate details which normal mapping could provide. Displacement mapping may be more of use which is essentially the same as normal mapping but serves the purpose of creating greater detail on an already detailed model i.e. similar to a bump map which creates the illusion of depth e.g. spots and lumps.
References:
Ahern, L., 2006. "3D Game Textures: Create Professional Game Art Using Photoshop". Focal Press Publishing
http://www.mudbox3d.com [accessed 4 March 2008]
http://www.pixologic.com/ [accessed 4 March 2008]
Tuesday, 4 March 2008
Etude Two (2) - Introduction
Etude Title:
Texturing: a hybrid of elements
For the 2nd etude I have decided to explore the areas around texturing in 3D. This is a natural creative progression from my first etude. Fundamentally texturing techniques are a key creative skill I have yet to learn. During this etude I hope to create a piece that further demonstrates the hybrid of real world images and a 3D model/artwork. For the etude I will be using 3DS Max and Photoshop to create texture and apply it to a model. During this etude I expect to primarily focus on the use of UV unwrapping to create detailed and essentially accurately placed textures on a 3D model using real world references to help achieve an accurate depiction of my original concept. Lighting techniques will be and essential factor during this process. This will further improve my skills as an artist and help develop my multimedia talents to help mix real world and design elements with 3D.
Sunday, 2 March 2008
Etude One (1) - Process
I initially attempted to utilise the spline method which seemed promising but the result was unfavourable as to further editing and wasn't as efficient as I thought it would be.


Method Evaluation
I may have caused an error in the splines but when overlooking other examples of this process it seems that its quite inefficient for full form modelling. In addition I'm attempting to keep the model's poly count low and one of the main attributes of spline modelling mentioned in the tutorials was that the model would be smooth and hence a higher poly count. Also the cleaning up and poly editing process after the spline editing seems extensive and inefficient and therefore straightforward polygon editing is preferable.
I then found tutorials on different forms of modelling in 3D for various software as the general techniques involved in the modelling process are generally easily translatable across 3D software platforms. I found a tutorial that demonstrates the method of creating and fleshing out the polygons for each of the facial features and then stitching them together.

Above image - Available at: http://www.3dtotal.com/team/tutorials/juliandobby/julian_dobby_01.asp
[accessed 29 February 2008]
I then went back re analysed my references and utilised this method. This meant continual use of the Extrusion and Weld tools within 3DS Max.


The forming of polygons helped me to economise my polygon count but also the process felt slightly daunting with the process encouraging the maintaining of the models form and thus more polygons were used than intended in some points. This made the stitching process more arduous despite the ease of 3D Max's Weld and Target weld tools.
The lips and nose on the model were created separately using a plane converted to an Editable Poly and formed to fit the mouth area and match the polygon flow or help redirect it.
For the hair I used the same method and created them in seperate chunks that reposition around the head, I then applied the shell modifier to them to add volume.


I'm relatively pleased with the end result but in certain areas during the process when joining the polygons the slightly unstructured process seemed quite daunting and the model lost some of the smooth flow of polygons during the process. An important factor constantly reiterated through tutorials is the importance of the edge flow on the model. I believe the etude was effective in helping evaluate modelling techniques and the final result was an accurate model based on my design and thus showing the translation from 2d to 3d and is thus a hybrid of design. I feel that although the other modelling processes have their benefits they still seem to fall short of simple base box modelling and subdivision in preserving the models continuity and keeping the poly count low.
Subscribe to:
Comments (Atom)